


**This post contains affiliate links**
It started with the carpet.
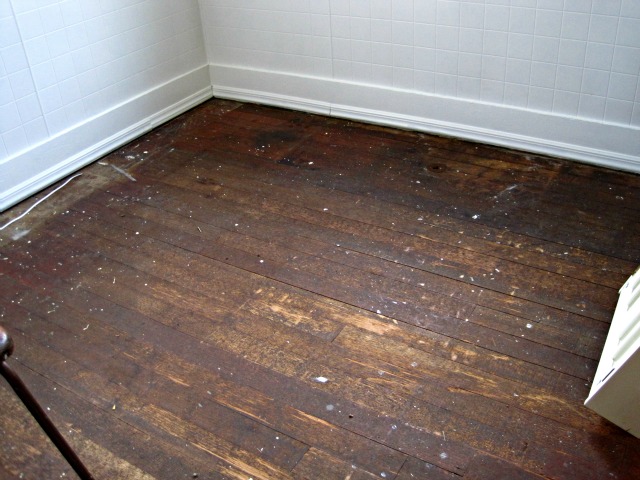
Our little 1934 farmhouse had a tiny kitchen... that was carpeted.

I knew from the get-go that I didn't really want to have carpet in the kitchen (mostly because I'm a klutzy mess and I'm sure that the poor carpet would be covered in spaghetti-sauce stains about 4 minutes after I moved in)...
... but realizing that the carpet was covering the original, 1934 hardwood floors made me even more determined to get rid of it and reclaim those beautiful floors!
In fact, I figured, while I was at it, why not reclaim ALL the hardwood floors???
And so began my journey through time and space and lots and lots of glue.
When it comes to getting glue and adhesive off of your hardwood floors, there are three major fields of thought:
Ways to Get Glue off of Hardwood Floors
Solvents-
Using chemicals (people recommend lots of different ones) to soften or eat away at the glue, making it easy to mop up. It's supposed to work well, but could soften the hardwood... which was a risk I didn't want to take on such an old floor.
Sanding-
Just get a big ole floor sander and have at it. It's good plan, too, if you have a sander. We knew we'd be renting one eventually, but the amount of remaining glue on the floors meant that I'd go through sandpaper super fast, without much to show for it. Sanding would take a long time and cost quite a bit of money, but would reduce damage to the floors.
Scraping-
Scraping off the glue by hand. The most economical, didn't require a lot of skill, and minimized chances of damage, but time consuming.
We decided to go for the scraping option. I would spend my evenings scraping glue off of floors, and Trevor could mow our giant lawn and do some more skilled tasks (like, plumbing and stuff).
And, because we're nuts and did ALL THE FLOORS, you get two different types of glue removal for the price of one. You're very welcome.
The types of glue and adhesive do differ slightly- here were my experiences.
Here's What We Did!
REMOVING CARPET TILE ADHESIVE
The first step was to simply pull up all the carpet tiles that were stuck onto the floor.

Pulling up in progress...
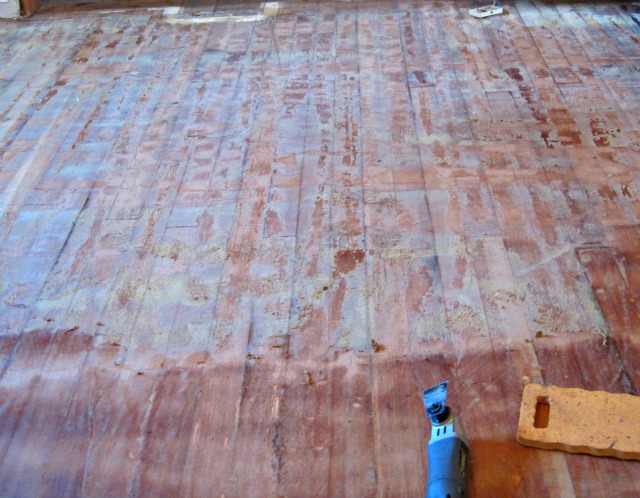
You'll notice that, unfortunately, some of the adhesive on the carpet also pulled up slivers of the hardwood underneath- so I went slowly and carefully to minimize the damage as much as I could.

The end result looked something like this.
All that gray-blue stuff? The remaining carpet glue. Rather sticky.
Next came the scraping.
I started with a putty knife (slow going, not very efficient, and pretty clumsy) and then 'graduated' up to a razor blade. The razor was working pretty well, but it was so slow. The glue was coming off my hardwood floors... but after about two hours, I had barely scraped two square feet of floor!
There had to be a better way.
Enter the power tools.
I began using a powered multi tool (similar to this one) to scrape the floor- using the rigid scraper attachment.
(Don't use the flexible one. It doesn't work nearly as well. Trust me).
 |
| Multi-tool lovin'. |
I was pretty nervous that I was going to ding up the hardwood, but by going carefully and gently, without putting any pressure on the blade (don't push down!), it worked great.
And faster. Lots faster.
The trick was to go pretty quickly over the surface, then clear away the scraped up glue (so it didn't get mushed back onto the floor), and then go over the surface again to get any of adhesive that I missed. Then, after getting a good chunk done, I'd sweep up the glue.
There were a couple of spots where I went too deep with the tool (mostly when I was getting tired and started pushing down...) and got a chunk of wood, but those spots were easily sanded down after the fact. (We'll get there.)
Another thing I'd recommend is some ear protection. Between the noisy tool and the fact that everything echoed in my empty house, I was glad to have a set of these noise-blocking headphones.
(And with these things on, I could pretend that I was at a spa instead of on my hands and knees scraping up glue. Ahhh, the zen....)
All told, the kitchen floor and the little bit of bedroom floor that also was carpeted took about ten hours to scrape clear of most of the glue.
REMOVING VINYL GLUE

I really expected that getting the glue off of the dining room floor, which was covered with hardwood-looking vinyl (why!?!?), would go faster than the kitchen did.
That was before we attempted to pull up the vinyl.

We quickly realized that it was best to carefully cut the flooring into smaller sections to pull it up- because it was glued down with what I can only hope is an excessive amount of glue.
It doesn't look too bad in the picture, but it was basically a solid 1/8" layer of gum-consistency glue all over the hardwood. Walking on the floors was basically impossible because our shoes would stick to the ground.
Scraping was sloooow going- especially because the heat generated by my multi tool blade seemed to make the glue even stickier and gummed up the blade, and then oozed over the sides of the blade and went back on the floor. Great.
Wiping the glue off the blade with my hand was making a sticky mess, and using a rag to wipe the glue off was ineffective and little fuzzies from the rag made things worse... and stopping after every run to wipe glue was making everything take so much longer.

Thank goodness for disposable gloves.

Using my non-scraping hand (so, for me, my left), I carefully used my gloved hand to wipe glue off the blade... and eventually, the glue on the glove worked to help grab the glue from the blade. And then, when my hand was full of glue, I just turned the glove inside out and tossed it.

I went through about 15 gloves, all as full as that one up there. You can just imagine the amount of glue on the floor.
**Pro Tip: If you're doing a lot of scraping (like I did), change your blade. Seriously. I didn't realize how dull my blade was until Trevor got me a new one... having a sharp blade makes a huge difference and saved a ton of time.
You can get replacement blades for pretty cheap (Amazon is the cheapest I've found)- and having a couple on hand is a good idea... I did break one of my blades in the process, and not having an extra on hand would have set us back a couple days. **
The dining room floor, with it's intense amount of super sticky glue, took about fifteen hours to scrape.
Step One of Operation Reclaim Floors is complete.
And, as my husband says, after all this, I'd better love those floors.
It'll be worth it in the end, right?
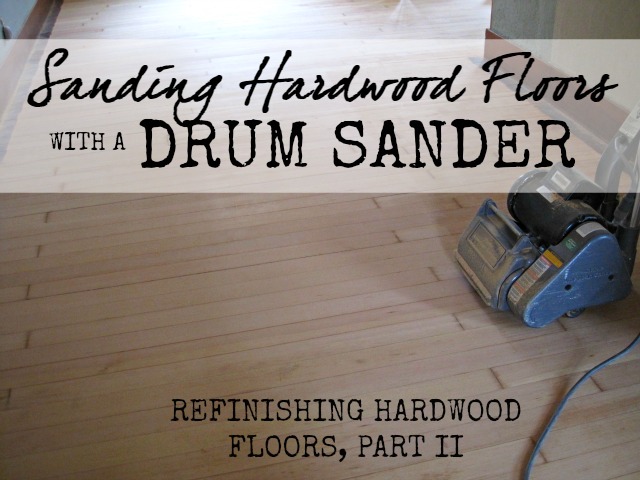
On to the next step: Step 2-- Sanding Hardwood Floors Using a Drum Sander
RELATED POSTS


DISCLOSURE: In order for me to support my blogging habit, I may receive monetary compensation or other types of remuneration for my endorsement, recommendation, testimonial and/or link to any products or services from this blog. You may see a full disclosure by clicking on my "About" page. I will only promote products that I use, enjoy, or take a shine to. All opinions and reviews are my own and are not influenced by any compensation I may receive.
Omg. That's so much work. Congratulations on finishing. It looks great.
ReplyDeleteAnd really... carpet in the kitchen?! That's just craziness.
Yeah, not my thing. And we're finished with the glue... next comes sanding! =)
DeleteTalk about a labor of love! It's going to be gorgeous!
ReplyDeleteI sure think it will be!
DeleteWow! That's so much work!! Not sure I'd have the patience for that but I can't wait to see how your floors turn out!
ReplyDeleteYes, it's been a lot of work! I'm so looking forward to having the floors done. Thanks for stopping by!
DeleteAt least our bedrooms and hallway didn't have glue. The 2 bathrooms did. I scraped them. Now... the big kitchen is waiting for me to pull up the indoor/outdoor glued down carpet.
ReplyDeleteWhy, why with the bathroom and kitchen carpet? Why? We also had carpeted bathrooms, and yuck. Just yuck.
DeleteHopefully you find some gorgeous hardwood underneath that indoor/outdoor carpet in your kitchen, like I did!
(And I'd strongly recommend that multitool. I use that thing for EVERYTHING.)
This looks like a job and a half... I don't know that I would be brave enough to tackle the whole thing! Looks gorgeous now though so good work... take a much deserved break ;) . Thanks for linking up last week at the Welcome Home Wednesday Link Party! Can't wait to see what you share with us this week... the link up will be live tomorrow at 7am CST!
ReplyDeletePeople are always taking very good care of their floors. Therefore they used to invest more on flooring to look better and even invest more in flooring for maintenance. In most of the occasion it is really tough to maintain our floors; especially carpet and hardwood floor. The chance of damage and cracks will be increase due to lack of proper care and maintenance. Here from this article we learn how to take care of our hardwood floors without any high investment. Thanks for such essential tips.
ReplyDeleteTennis Courts